
How a 3-Day Small-Group Zion, Bryce, and Arches Photo Workshop…
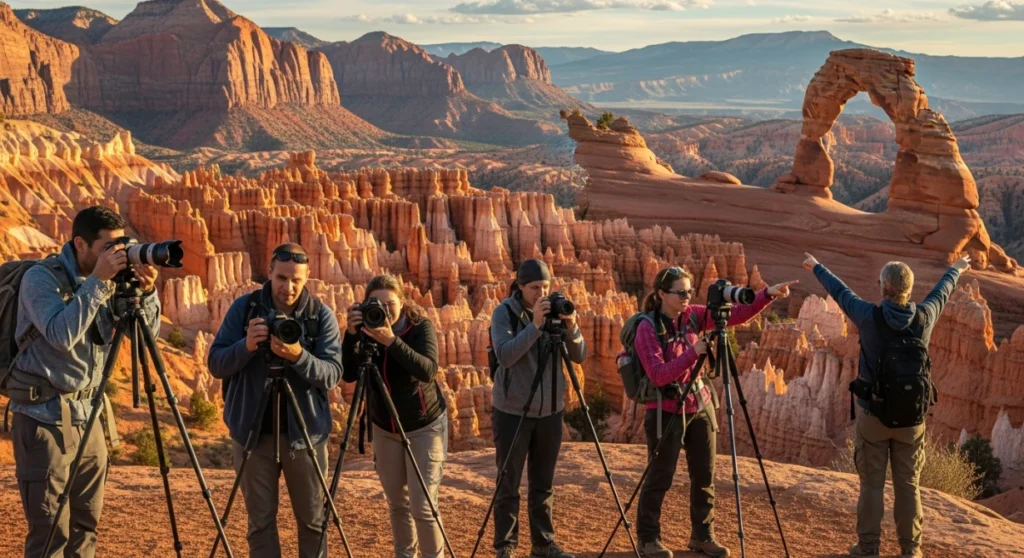
A realistic 3-day Zion, Bryce, and Arches photo workshop centers on one arrival shoot, one full sunrise-to-sunset field day, and one final sunrise before returning. Small groups make timing, instruction, and pacing far more manageable.
Many travelers picture a photo workshop as nonstop shooting, but the real challenge is balance. If you cram three Utah parks into three days without controlling start times, driving fatigue, parking friction, and midday light, you spend more energy managing the road than making photographs.
A realistic 3-day small private group photography workshop for Zion, Bryce, and Arches is a guided multi-day national parks trip built around light, logistics, and manageable movement. It helps photographers who want clear daily structure, personal instruction, and less stress than a self-driving tour of Utah national parks, especially when starting from Salt Lake City.
What people really mean by a “3-day Zion-Bryce-Arches photo workshop”
Most people do not mean a marathon of every overlook and trail. They mean a short, photography-first road trip where sunrise and sunset are protected, driving is pre-planned, and the group is small enough to adapt when light or weather shifts.
In practice, that usually means three stages. Day 1 handles pickup, travel, orientation, and a first golden-hour shoot. Day 2 is the longest field day, with a sunrise session, a park transfer, recovery time during harsher light, and an evening shoot. Day 3 finishes with a final sunrise session and the return drive.
A common 3-day workshop structure is arrival and orientation on day one, a full shooting day on day two, and a final sunrise session before departure on the last day.
That shape matters because good landscape photography depends less on checking boxes and more on being in the right place at the right time. When we adapt our Utah park itineraries for photographers, the goal is not to “do all three parks.” The goal is to reach a few strong locations in each park with enough time to work compositions instead of hopping out for five minutes at a crowded pullout.
Who this kind of workshop is ideal for, and who it is not
This format is best for enthusiasts who want guidance, strong light timing, and a small group that moves efficiently. It is not the best fit for travelers who want to sleep late, linger for hours in one hotel, or cover every famous stop in each park.
The sweet spot is the traveler who enjoys early starts, can handle several short walks over uneven ground, and wants feedback on composition, settings, or shooting decisions in the field. You do not need to be a pro. Small groups make it easier for newer photographers to ask basic questions without feeling like they are holding anyone back, while more advanced photographers still benefit from route planning, local context, and timing.
Private departures work even better if your group has a clear style. One group may want classic sunrise and sunset viewpoints with easy access. Another may want more advanced instruction, longer setup time with tripods, or a stronger night photography emphasis at Bryce. The schedule can tilt either way as long as everyone understands the tradeoff between extra walking, extra driving, and available light.
- Good fit: You want structure, coaching, and a clear day-by-day plan without personally managing roads, parking, or access rules.
- Good fit: You are comfortable with predawn wake-ups and short-to-moderate walks on park terrain.
- Good fit: Your priority is a handful of well-timed locations, not exhaustive sightseeing.
- Less ideal: You want a leisurely vacation with late breakfasts and minimal movement.
- Less ideal: You dislike changing plans based on clouds, closures, or light.
That small-group philosophy is already central to how we operate. On our local guided walks, groups stay small so guests can ask questions and explore hidden spots with a local guide, and the same logic carries over when we shape a national parks trip around photography rather than bus-style throughput.
You found a hidden promo code!
Use code WOWBLOG at checkout and get 10% OFF any tour!
Limited time offer. Book now and save!
Browse ToursHow a typical 3-day Zion–Bryce–Arches photo workshop flows
The flow is simple: one travel-and-orientation day, one full field day, and one final sunrise-plus-return day. Responsibilities are split clearly, with the organizer handling route logic and timing while guests focus on shooting, pacing, and preparation.
For most travelers, the biggest surprise is that the workshop is not wall-to-wall hiking. The rhythm alternates between concentrated shooting windows, scenic transfer segments, short recovery blocks, and practical camera time such as image review, battery charging, or discussing the next location.
| Stage | Typical timing | What the group is doing | Who owns the decision | Useful output for the guest |
|---|---|---|---|---|
| Arrival and setup | Day 1 morning to afternoon | Pickup, road transfer, gear check, orientation, first location planning | Guide handles route and timing; guests confirm comfort level and camera goals | A realistic shooting plan for the first evening |
| First golden hour | Day 1 late afternoon to sunset | Short walk or viewpoint session with composition help | Guide positions the group; guests choose focal length, framing, and pace | Warm-up images and a feel for group rhythm |
| Main field day | Day 2 predawn to night option | Sunrise shoot, transfer, midday break, sunset session, optional night work | Guide adjusts for light, weather, and fatigue; guests communicate energy and goals | Best chance for variety across conditions |
| Final sunrise and return | Day 3 predawn to evening | Last shoot, selective stops, organized return to Salt Lake City | Guide protects return timing; guests prioritize final shot list | A finished trip with a coherent set of images, not random snapshots |
This is also where a capped group matters. In photography-focused trips, around four to six participants is a practical range because it is easier to move quickly, fit into tighter viewpoints, and give one-to-one help without turning every stop into a queue.
Keeping workshop groups small, often around 4 to 6 participants, supports more personalized attention and a more intimate learning environment.
That directly answers the “three parks in three days sounds rushed” objection. It only feels rushed when the route is built like a checklist. A photo-oriented plan works because it sacrifices quantity for timing, uses substantial shooting windows at a few locations, and avoids wasting energy on poorly lit stops just because they are famous.
Day 1: Salt Lake City to Zion, orientation, and the first golden-hour shoot
Day 1 is about settling in without wasting the evening light. You leave Salt Lake City, use the drive for orientation and expectations, then reach Zion in time for a short, focused late-day session rather than trying to force a major hike after a long transfer.
The morning starts with pickup and a practical reset of the trip goals. Before the cameras come out, the guide clarifies the walking level, likely weather, how much tripod time the group wants, and whether anyone hopes for easier roadside viewpoints or is open to a more active route. That conversation matters because it prevents the classic mismatch where one guest expects a scenic drive and another expects a strenuous canyon day.
The road transfer is not dead time. It is when people learn the shooting rhythm, sort gear so essentials are accessible, and hear how the park order affects light and fatigue. This is one reason organized national parks trips are useful. The route, transfer timing, and stop logic are already handled, much like our longer Utah National Parks Tours from Salt Lake City are built to balance transport, key viewpoints, and realistic time on the ground.
By late afternoon, the goal is not to squeeze in every Zion landmark. The group heads to one or two locations that work well for first-night orientation, where walking is manageable and people can practice exposure decisions in changing golden-hour light. Newer photographers often use this session to settle basics such as histogram checks, foreground placement, and tripod discipline. More advanced guests use it to test how fast the group moves and how much setup time they will realistically get on the following morning.
After sunset, there is usually a simple debrief rather than a long lecture. Cards are backed up, batteries go on charge, lenses are cleaned, and the group reviews the sunrise plan before getting to bed early. The acceptance criterion for Day 1 is not “amazing portfolio work.” It is that everyone understands the rhythm, knows tomorrow’s wake-up time, and has a practical shot list for sunrise.
Day 2: Sunrise in Zion, transfer to Bryce Canyon, sunset, and night photography options
Day 2 is the most intensive photography day, but it is structured around light and energy instead of constant exertion. You start before dawn in Zion, transfer later in the day to Bryce Canyon, pause during harsher midday conditions, and finish with sunset plus an optional night session if the group still has energy.
The predawn wake-up is the price of good light, but it should not feel chaotic. Clothing, headlamp use, breakfast timing, and camera setup are sorted the night before, so the group can move quietly and reach position with enough time to work through blue hour into sunrise. Small numbers help here. Four to six people can spread out at a viewpoint, avoid walking into each other’s frame, and still hear quick field instruction.
Once the first Zion session ends, the workshop shifts from pure shooting to logistics management. The group gets food, takes a short recovery break, and starts the transfer toward Bryce. This is where organized travel earns its value. Guests are not driving sleepy after a sunrise shoot, checking closure notices on the fly, or losing time to parking experiments while the best light window is already approaching.
Midday is usually the least flattering light for grand landscape scenes, so the schedule often softens here. That can mean a meal stop, a scenic transfer, image review, or a simple rest block before the evening session. The point is not to waste daylight. The point is to protect the parts of the day that matter most for photography.
By late afternoon in Bryce, the focus returns to edge light, depth, and changing shadow patterns. Because the terrain is visually dense, photographers often need more time here to refine composition than they expect. A small private group can hold back at one rim or overlook until the hoodoos separate cleanly in the frame instead of being pushed onward by a large-bus schedule.
If conditions and energy align, Bryce can also support a night photography add-on after sunset. This should always be treated as optional. At elevation, temperatures and fatigue can change quickly, and the best decision for image quality may be to stop after sunset, back up files, and protect the next morning rather than chase one more setup.
Safety matters more than ambition in this segment. Water-related routes in Zion, including Narrows-style conditions when relevant to a trip design, require proper gear and judgment about the day’s conditions, and guides help match route choice and equipment to ability rather than forcing the same plan on everyone.
Trips that involve routes like The Narrows require appropriate water-specific gear and attention to current conditions so participants are properly prepared.

Day 3: Sunrise in Arches and the return, with a clear wrap-up to your shooting plan
Day 3 is about one last high-value shoot, not squeezing in endless stops on the way home. The morning begins early in Arches, then the return is managed so guests leave with a coherent set of images and a clear sense of what they captured, what they missed, and what would justify a longer future trip.
The final sunrise session works best when the group arrives with a narrow plan. By now, people know their pace, preferred focal lengths, and whether they want a grand view, an arch composition, or detail studies. That clarity is useful because the last morning has the least margin for indecision. You are balancing darkness, setup time, and a long drive back to Salt Lake City.
After sunrise, the trip does not usually turn into a full second Arches day. There may be a selective stop or short walk if timing allows, but the guiding principle is disciplined editing of the route. Guests should not feel stranded between “we are still shooting” and “we have to get back.” A strong workshop protects the return as carefully as it protects the first light.
The wrap-up stage matters more than many travelers expect. On the road back, photographers can review whether they achieved the trip’s main deliverables: at least one well-timed shoot in each park, a realistic understanding of how they work under changing conditions, and enough instruction to repeat the process more confidently next time. For some, that confirms that three days is ideal. For others, it reveals that they would prefer the same route with an extra day or a deeper focus on one park.
What is included in the format, who handles what, and how quality is controlled
A well-run trip of this type includes transport logic, park sequencing, guiding, and field instruction shaped around light. Guests are responsible for personal camera gear, honest communication about fitness and skill level, and following the daily prep plan so the group can move on time.
Our role in planning is to reduce avoidable friction. That includes selecting a route that can realistically connect Zion, Bryce, and Arches from Salt Lake City, timing key viewpoints for sunrise or sunset, and building in enough buffer for rest, food, and transfers. That same operational discipline is why even shorter Utah day tours work well when time is limited. The day needs a shape, not just a list of places.
Quality control on a photography-focused trip is less about luxury and more about whether the day delivered what it promised. Did the group reach the morning location with setup time to spare? Were walking demands in line with what was shared in advance? Did guests get actual composition or technical help rather than simple transport? Did the midday block protect the evening shoot instead of exhausting everyone?
- Organizer responsibilities: Route design, timing, transfer management, field guidance, stop selection, and adapting to weather or closures.
- Guest responsibilities: Bring the right clothing and camera gear, stay realistic about fitness, keep batteries and cards ready, and communicate limits early.
- Acceptance criteria: The group reaches key light windows on time, the pace matches the stated walking level, and each guest knows the next step at the end of every day.
- Why professional organization matters: Serious commercial activity in national parks requires permits such as Commercial Use Authorization, and organized operators plan around those rules instead of expecting travelers to decipher them alone.
National parks require commercial operators, including workshop leaders, to comply with Commercial Use Authorization rules and operating conditions.
This also answers the “I could just drive myself” objection. Of course you can. What you are paying to avoid is predawn driving fatigue, sunrise-angle guesswork, last-minute parking problems, route confusion, and the hidden cost of making bad timing decisions in unfamiliar terrain.
What you should prepare before you book or request a custom version
The best preparation is clarity, not fancy gear. If you can tell us your dates, group size, photography level, and comfort with early starts and short hikes, we can adapt an existing Utah parks route into a realistic three-day photography-oriented trip instead of forcing you into a generic sightseeing schedule.
Private and small-group formats work best when the group agrees on priorities before the wheels start turning. A beginner-friendly version will allow more setup help and simpler walking. A stronger expedition-style version, including a multi-day guided photography expedition visiting Zion Bryce and Arches for advanced photographers, will usually lean harder into sunrise discipline, tripod time, and optional night work.
- Choose your shooting goal: Decide whether you want classic grand landscapes, technique coaching, night photography, or a balanced mix.
- State your real experience level: “Enthusiast who knows the basics” is enough. You do not need pro credentials, but the guide does need an honest starting point.
- Be specific about mobility: Note whether you prefer easier viewpoint access or are open to more active short hikes.
- Pack for changing conditions: Predawn cold, sun exposure, and uneven terrain can all happen within the same trip.
- Prepare your camera routine: Extra batteries, memory cards, backup method, and a simple plan for cleaning lenses and organizing files each night.
- Tell us your group size: Four to six is excellent for photography because it keeps instruction personal and movement efficient.
If you are deciding between organized travel and a solo road trip, use one practical test. Ask yourself whether you want to spend the week before departure researching sunrise timing, pullouts, walking levels, transfer math, and access rules, or whether you want that framework already solved so you can focus on images.
For many travelers, the next step is not booking a fixed workshop. It is reviewing the base structure of our Utah national park routes and then sending a short inquiry with preferred dates, group size, and photography goals so the itinerary can be adjusted around those priorities.
A three-day photography-focused run through Zion, Bryce, and Arches works when the days are built around light, not around the maximum number of stops. The right version gives you one manageable orientation evening, one full field day, and one final sunrise with a disciplined return, all while keeping the group small enough for real instruction and flexible pacing. If you are an enthusiast who wants guidance without the feel of a giant bus tour, this format is often a better fit than either a DIY sprint or a generic sightseeing loop. To start shaping that kind of trip, review the Utah National Parks Tours and send your dates, group size, and photography goals for a custom three-day request.
Will I spend most of the trip in the vehicle?
No. There are major transfer segments, but the schedule protects sunrise and sunset shooting windows and avoids turning every stop into a quick parking-lot photo.
Do I need to be an advanced photographer to join this format?
No. It suits enthusiasts well, and a small group makes it easier to get help with exposure, composition, and field workflow.
How hard are the walks on a typical three-day photo trip?
Most versions rely on short to moderate walks, with harder add-ons kept optional. Walking level should be shared before the trip so the route matches the group.
Why is a small group better for photography than a large tour?
It is easier to move quickly, fit into tighter viewpoints, and give each guest more individual attention. It also helps people avoid stepping into each other’s frame.
What happens during the middle of the day when light is harsh?
That time is usually used for transfers, meals, rest, or image review. Protecting energy then improves the chances of a stronger sunset session later.
Can this kind of itinerary include night photography?
Yes, often as an optional add-on after the Bryce sunset session. Whether it makes sense depends on weather, fatigue, and the group’s priorities.
What should I mention in my inquiry for a custom version?
Send your preferred dates, number of people, photography level, and whether you want easier access viewpoints or are open to more active short hikes.
 Your First Evening in Salt Lake City: A Low-Pressure Orientation Plan
 Bonneville Salt Flats Photography Etiquette: How to Protect the Surface and Share the View
 How to Plan an Antelope Island Birdwatching Visit
 Why Are There So Many Brine Flies on Antelope Island?
 Antelope Island Day Tour or Sunset Wildlife Tour: Which Fits Your Salt Lake City Schedule?
 How to Dress for Changing Weather on Antelope Island

This experience is a must-do! Dima explains the history of the area as well as the...
Read more →I had never been on a guided tour before, but Dima made it the best experience...
Read more →This was a great tour, it was nice to get picked up from our hotel. It...
Read more →Great guide great information and great deal for the money.
Read more → Bonneville Salt Flats – Sunset Adventure of the White Desert
 Antelope Island – Wild Heart of the Great Salt Lake Adventure
 Antelope Island Sunset Wildlife Expedition – Great Salt Lake Odyssey
 Bonneville Salt Flats – Journey to the Edge of the World