Complete packing list for a photography-focused night hike to Mesa Arch at sunrise
Apr 19, 2026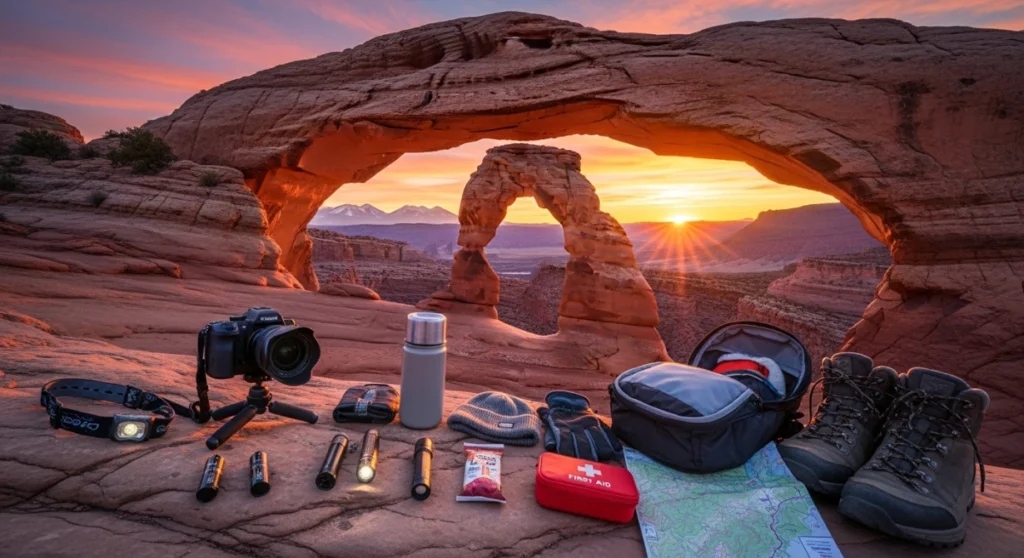
Pack for cold, dark, rocky conditions first, then for photography. Prioritize lighting, layers, water, tripod, and batteries, run a go/no-go check at the car, and keep all travel on rock or established trail.
Most people show up for Mesa Arch at first light with a tripod and a hoodie, then spend the next hour shivering, fumbling for batteries, or fighting condensation on their lens. The desert looks simple on Instagram, but hiking in the dark, in dry cold wind, on uneven rock is where missing gear turns into missed shots. If you want that first sunstar through the arch without stress, you need to plan your loadout like a small alpine mission, not a casual stroll.
The trail is short, but the environment is harsh. You will be moving in full darkness, standing nearly still for long stretches, and shooting in a place where you cannot step off rock or packed soil without damaging living crust. The right packing list is less about carrying everything and more about carrying the few things that let you hike safely and shoot efficiently.
Define your goal and what “ready” actually means
Before you throw gear into a bag, get clear on the outcome you want from this night hike and how you will measure readiness. That keeps your pack tight and your decisions simple at 2 a.m.
Primary goal for a Mesa Arch sunrise mission
- Photo objective: Arrive at Mesa Arch 60–90 minutes before first light, claim a safe shooting spot, and capture sharp, well-exposed images from blue hour through sunstar and early glow.
- Safety objective: Hike in and out without injury, dehydration, hypothermia, or getting off trail in the dark while respecting park rules and delicate desert surfaces.
Measurable readiness criteria before you leave your car
- Hydration: You are carrying enough water to reach at least one gallon per person for the full day in the desert, even if the hike itself is short.
- Navigation: You have at least two light sources with fresh batteries, plus an offline map or clear understanding of the 0.6 mile round-trip route and its rocky steps.
- Thermal comfort: You can stand mostly still for two hours in pre-dawn wind without shivering uncontrollably.
- Camera readiness: Batteries are charged, memory cards are empty, and your tripod and head are functional and easy to operate with gloves.
Priority buckets: what you must pack vs what you can skip
Think of your load in three layers. The “must” items protect life and your core photo objective. “Should” items raise your success rate. “Nice” items add comfort if there is space.
Must-pack: non‑negotiable items
- Water capacity: Enough bottles or a reservoir so you can realistically drink up to a gallon through the full desert day, not just this hike.
- Headlamp with red mode: Hands-free, bright enough to see rocky steps and uneven trail. Red mode helps preserve night vision around other photographers.
- Backup light: A small secondary light for redundancy in case your primary fails.
- Insulating layers: Base layer, warm mid-layer, and a wind-resistant outer layer that you can open or close quickly.
- Gloves and warm hat: Thin, dexterous gloves to operate camera controls and a beanie or similar to keep heat from leaking away while you wait.
- Camera body and main lens: A camera you know well and a wide lens that can show the full arch and rising sun.
- Sturdy tripod: Stable enough for long exposures on rock, with leg locks you can work in the cold.
- Extra batteries and cards: Cold drains batteries fast. Bring more than you think you need, stored in an inner pocket.
- Footwear with grip: Hiking shoes or boots with good traction for rock, plus socks that keep your feet warm during long standing.
- Navigation backup: Offline map or clear mental map of the very short but uneven trail so you stay on designated surfaces.
Should-pack: boosts your success rate
- Microfiber cloth and blower: To deal with condensation or dust on the front element in cold air.
- Lightweight sit pad: For kneeling or sitting on cold rock while you wait.
- Hand warmers: Useful tucked into gloves or pockets to keep fingers responsive for camera work.
- Snacks with real calories: Simple, non-messy food you can eat in the dark to keep energy up.
- Second lens: A tighter focal length for details once the initial sunstar is over, if weight allows.
- Lens hood: To manage stray light and potential flare as the sun clears the horizon.
Nice-to-pack: comfort and creative extras
- Thermos with hot drink: Warm liquids make cold waiting much more pleasant.
- Lightweight down or synthetic blanket: Useful if you arrive very early or stay longer than planned.
- Small first aid basics: A few adhesive bandages and tape for minor scrapes on rock.
- Notebook or phone notes: To record exposure settings, timing of first light, and composition ideas for future trips.
- Remote release or interval timer: Helpful, but you can work around it with a self-timer if needed.
You found a hidden promo code!
Use code WOWBLOG at checkout and get 10% OFF any tour!
Limited time offer. Book now and save!
Browse ToursExecution order and timing: what to pack and prep when
A night hike to shoot sunrise has three planning windows. What you do at home, in town, and at the trailhead directly affects what you must carry and whether you can react to changing conditions.
24–12 hours before the hike: home or hotel prep
- Charge and clear: Fully charge all batteries, then put at least one spare in a warm pocket-ready spot. Format memory cards only after you have backed up any remaining images.
- Weather and sky check: Look at wind, temperature, and cloud cover around sunrise, then adjust your clothing layers and whether you bring a second lens.
- Pack by priority: Lay out must-pack items first, then “should,” then “nice.” If your bag feels overloaded, remove from the “nice” tier, not from safety or core imaging gear.
- Trail familiarity: Study the 0.6 mile round-trip route and its modest elevation change so you know to expect rocky sections and stone steps in the dark.
Same afternoon or evening: on the road phase
If you are driving your own vehicle or combining a self driving tour of utah national parks with guided experiences, lock in logistics well before dark so you are not scrambling overnight.
- Fuel and timing: Make sure the vehicle is fueled and you have timing for park entry, restroom stops, and the drive to the trailhead.
- Meal planning: Eat a real meal in late afternoon or early evening. Night hiking on an empty stomach makes you colder and more distracted.
- Repack for quick access: Put headlamp, gloves, hat, and camera at the top of your pack so you can gear up without spreading items in the parking area.
Trailhead and hiking window
At the parking area and on the short trail, keep your system tight and repeatable. The less you dig through your bag in the dark, the more attention you have for footing and route.
- Trailhead routine: Put on your warmest layers at the car. Turn on your headlamp and confirm your backup light works before you leave the vehicle.
- Pack test: Put the pack on, take a short walk around the lot, and confirm the weight feels stable and not top-heavy.
- On-trail pacing: Walk slowly enough that you can see and choose each step on rocky sections and stone steps. It is an easy hike by daylight but feels more serious in the dark.
- At the arch: Choose a shooting spot that is on rock or durable surface and far enough from the edge that you can work safely with other visitors arriving around you.
Risk controls and common critical misses
Most problems at Mesa Arch are preventable with a few specific controls. Use these as your guardrails when you build your packing list and decide whether to proceed.
Environmental and regulatory risks
Carry and drink at least one gallon of water per person per day in the desert, and save strenuous activity for cooler hours to avoid heat stress.
- Dehydration risk: Even on a short outing, bring enough capacity that you can hit the recommended daily intake as part of your wider desert day.
- Soil damage: Biological soil crust around Moab is alive, retains moisture, and prevents erosion. Stay on rock or established trail surfaces so your feet do not crush this living layer.
- Light use regulations: Park rules allow artificial lights for route finding or minimal camping needs but not for lighting up landscapes or rock formations as photo subjects. Your headlamp is for safety, not for painting the arch.
Frequent gear mistakes and how to avoid them
- Packing too light on warmth: The desert can be cold before dawn. If you hate the idea of standing still in your current layers in a 40°F breeze, add one more warm piece.
- Single point of failure lighting: Many hikers bring only one headlamp. A backup light is small and turns a potential emergency into a minor inconvenience.
- Unstable tripods: A flimsy or unfamiliar tripod wastes precious minutes as light peaks. Test leg locks and your ball head at home, and practice setting it up with gloves.
- Loose items in the dark: If your bag has many small accessories, use one pouch for all photo extras so nothing rolls off rock in the pre-dawn chaos.
Personal limits and fatigue
Driving long distances, sleeping little, and then navigating uneven terrain in the dark magnifies small errors. If you already feel exhausted when you reach the park, consider scaling back.
- Sleep check: If you have had almost no sleep, your decision-making and balance are affected. That is a meaningful safety risk on rock edges and steps.
- Partner communication: If hiking with others, agree in advance on what happens if someone feels unwell or wants to turn back.
Go/No-Go readiness checklist for your Mesa Arch pack
Use this short list as a final gate at your car or lodging. If you cannot check most of the “go” boxes, adjust or postpone. The trail is forgiving, but darkness, cold, and crowds are not.
| Item or criterion | Go if… | No-go or adjust if… |
|---|---|---|
| Lighting | You have a working headlamp plus a backup light | You have only one light source or questionable batteries |
| Warmth | You can wear three layers on top, plus hat and gloves | You rely on a single hoodie or thin jacket |
| Water | You carry enough to contribute to a one-gallon day total | You plan to “be fine” with a small half-full bottle |
| Footwear | Your shoes have good grip and feel broken in | You are in smooth-soled sneakers or new, untested boots |
| Camera basics | Batteries are full, cards are clear, tripod is solid | You “hope” there is enough battery or storage for the morning |
| Navigation | You know the short route and main features like stone steps | You are unsure where the trail starts or how it runs |
Practical packing examples for different photographers
Two simple scenarios can help you translate the theory into the actual contents of your bag. Adjust based on your comfort with cold, your camera system, and how far you travel that day.
Scenario 1: First-time visitor with basic photo kit
This is a realistic setup for someone driving themselves, carrying one camera body and one wide zoom, and focusing on that classic sunstar through the arch.
| Category | Packed items | Notes |
|---|---|---|
| Safety must-haves | Headlamp, small flashlight, 2 liters of water, warm hat, gloves, three clothing layers | Enough for short night hike plus time exploring viewpoints later |
| Camera core | Camera body, wide zoom lens, sturdy tripod, 2 batteries, 1 memory card | Minimal but fully functional kit |
| Support gear | Microfiber cloth, hand warmers, light snacks | Simple comfort and lens care |
| Optional comfort | Thin sit pad, small first aid basics | Easy to add if space allows |
Scenario 2: Returning visitor fine-tuning compositions
A photographer who has been before might bring a second lens and stay longer, but still respect weight and simplicity.
- Safety tier: Same as Scenario 1, with slightly more water if planning to scout after sunrise.
- Camera tier: Camera body, wide lens for the main composition, medium telephoto for detail shots of canyon layers, 3 batteries, 2 cards, remote release.
- Extras tier: Thermos with hot drink, lightweight wrap or blanket, notebook to record exact time of first light and best framing positions.

How tours and shuttles fit into your packing and logistics
If you are piecing together a longer Utah itinerary, your packing list intersects with decisions about driving, shuttles, and guided days. The less energy you spend on road logistics, the more you can focus on carrying the right gear and resting between shoots.
Driving yourself vs structured day tours
Some travelers choose to drive their own vehicle between parks, then add focused guided days, walking tours in Salt Lake City, or single-day nature excursions from the city. This blended approach keeps freedom for sunrise missions while offloading some planning to local experts.
Day experiences that leave from Salt Lake City can handle transport, basic guiding, and a realistic schedule to desert highlights or mountain areas. That reduces the need for constant navigation work on your own and can free mental bandwidth for your camera work and packing decisions.
| Option | How it helps photographers | Typical use |
|---|---|---|
| Self-drive days | Maximum control over sunrise/sunset timing and staying at a viewpoint as long as you want | Dedicated photo missions like Mesa Arch sunrise |
| Guided walking tours in the city | No driving, light physical effort, chance to rest between intense shoot days | First day in Salt Lake City to learn layout and history |
| Nature-focused day trips | Transport, commentary, and short walks handled by a guide | See more landscapes on a “rest” day without complex logistics |
If you prefer not to manage every drive yourself, you can look at structured options such as Utah day tours from Salt Lake City and then keep sunrise missions like Mesa Arch as your self-planned highlights.
When to consider a shuttle or tour instead of driving
- Limited days: If your schedule is tight and you want the best tours of utah national parks without researching every road and trailhead, guided days can complement a few self-planned sunrise shoots.
- Fatigue management: After multiple pre-dawn hikes, letting someone else handle a day’s driving can keep you safer and sharper for your next dawn mission.
- Budget planning: Instead of a budget shuttle service salt lake city to arches national park for every transfer, mix cost-effective transport with a few key guided days and one or two self-driven sunrise hikes.
Practical recommendations: tighten your list without losing safety
Use these focused tips to fine-tune your packing so you stay mobile, comfortable, and ready to shoot from the moment the horizon starts to glow.
- Pre-pack outfit and layers: Lay out your complete clothing system, including socks and gloves, the afternoon before. If you cannot see a gap by eye, you are less likely to forget something when the alarm goes off.
- Assign pockets with intent: Keep batteries in one inner pocket, lens cloth in another, and snacks within easy reach. Never spread critical small items across random places in the pack.
- Rehearse tripod setup: Practice setting up and leveling your tripod in a darkened room using only your headlamp. Time yourself so you know you can be ready within a minute on the rim.
- Protect the trail and crust: When you scout compositions, commit to moving only on obvious rock and formed trail. If a shot would require stepping onto fragile soil, skip it instead of damaging the living crust.
- Build a post-hike reset kit: Keep a small bin in your vehicle with extra water, dry socks, and a simple snack. That way you can reset quickly after the hike and be ready for the rest of your day in the park.
Conclusion
A successful night approach to Mesa Arch is less about carrying everything and more about carrying the right things in the right order. When you frame your packing list around safety, warmth, and a lean shooting kit, you avoid both overload and critical gaps. Use the must/should/nice structure, confirm your go/no-go criteria at the trailhead, and keep your impact light on the land under your feet. With that foundation, your sunrise session becomes about timing and creativity instead of scrambling for basics. If you want help stitching this shoot into a wider Utah itinerary, MateiTravel can handle select touring days so you can focus fully on your key sunrise missions.
How early should I arrive at the Mesa Arch trailhead for sunrise photos?
Plan to be at the trailhead 90 minutes before sunrise, which gives time to gear up, hike in the dark, and claim a safe shooting spot well before first light.
Do I really need two light sources for such a short hike?
Yes, a backup light is important because the hike is in full darkness, and a single headlamp failure on rocky terrain can quickly become a safety issue.
How much water should I pack just for this night hike?
Carry enough to contribute to at least one gallon per person for the whole desert day, even if the hike is short, since dry conditions and later activities increase your needs.
What kind of tripod is best for shooting at Mesa Arch?
Choose a tripod that is stable on rock, with leg locks and a head you can operate easily with gloves in cold pre-dawn conditions.
Can I use a flashlight or light panel to illuminate Mesa Arch for photos?
No, artificial lights can be used only for finding your way or minimal camping needs, not for lighting up rock formations or the arch itself.
Is a second lens necessary for a first visit to Mesa Arch?
No, one wide lens is enough for the classic sunrise shot; consider a second lens only if you have weight and space after packing safety essentials.
What should I wear if I tend to get cold while standing still?
Bring a base layer, a warm mid-layer, a wind-resistant outer layer, a hat, and gloves, and add a compact blanket or extra jacket if you know you chill easily.
How can I protect biological soil crust while exploring around the arch?
Stay on rock, formed paths, and durable surfaces, and avoid stepping onto bare-looking soil that may actually be living crust supporting the desert ecosystem.

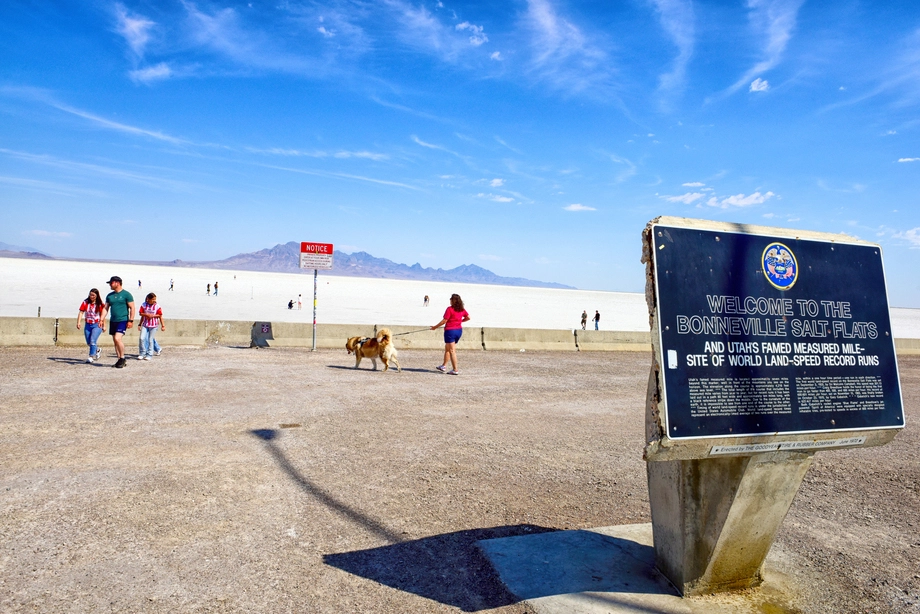 Bonneville Salt Flats – Journey to the Edge of the World
 Bonneville Salt Flats – Sunset Adventure of the White Desert
 Antelope Island – Wild Heart of the Great Salt Lake Adventure
 Salt Lake City – The City of Zion. Historical Interactive Walking Tour
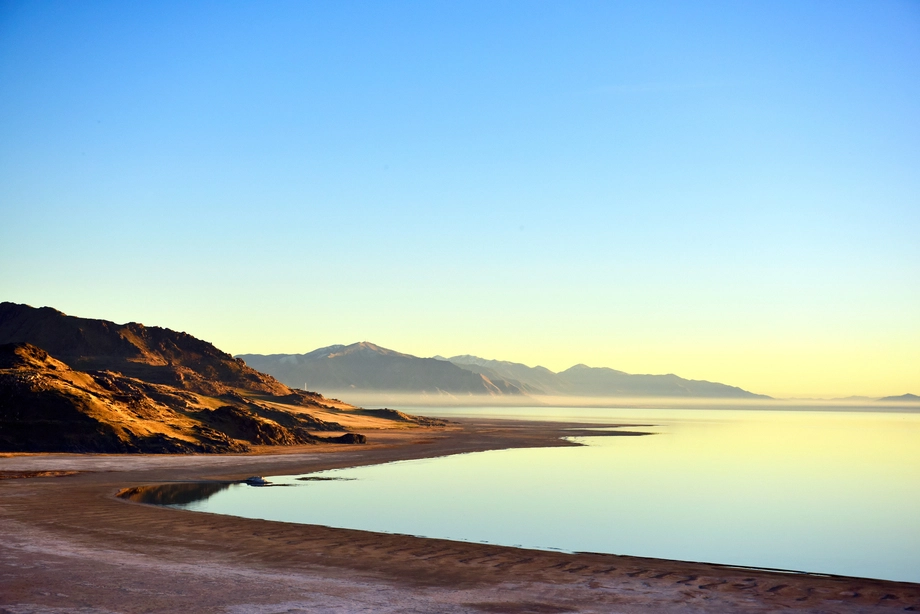 Antelope Island Sunset Wildlife Expedition – Great Salt Lake Odyssey