Backcountry skiing near Park City: how guided days actually work in practice
Mar 22, 2026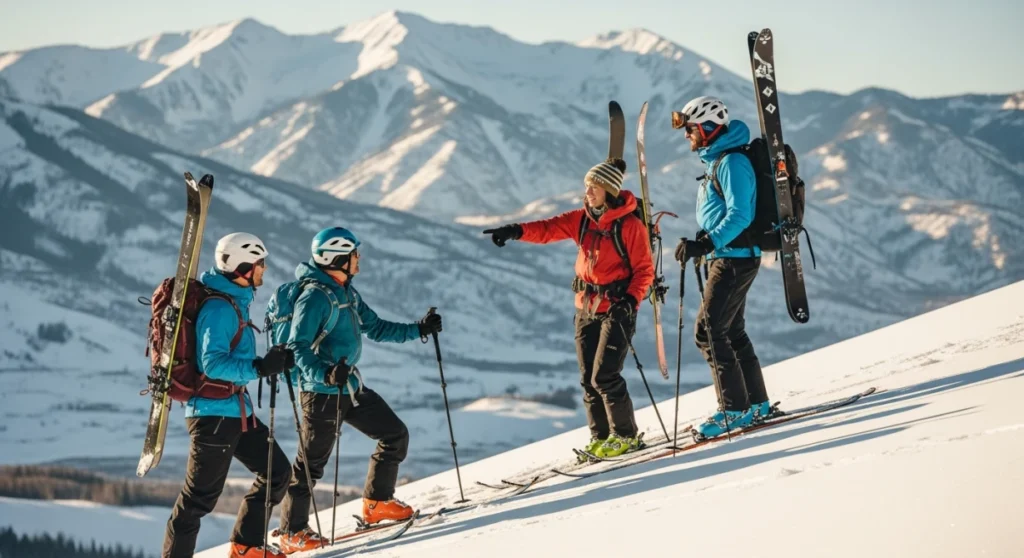
A guided backcountry day near Park City is a structured partnership. The guide manages terrain and safety, while you handle honest self-assessment and preparation so conditions, not confusion, define the day.
Plenty of strong resort skiers arrive in Utah, book a guide for the backcountry above Park City, and then realize in the parking lot that they have no idea how the day actually works or what’s expected of them. That confusion can waste time, create stress, and sometimes push people onto terrain they are not ready to manage. If you understand the flow, the roles, and the safety checks before you book, you can treat the day like a focused learning experience instead of an expensive mystery.
This guide walks through how a typical guided tour runs, when it makes sense to hire a guide, and what you should bring to the table as a client so you get a safe and rewarding first taste of touring.
When a guided backcountry day around Park City is the right fit
A guided day is not just “a cheaper heli-ski day” or “off-piste with a local.” It is a structured service with shared responsibility, and it fits best for certain types of skiers and goals. The key is matching your expectations with what guides are designed to provide.
Who gets the most value from a guide
You are likely a good match for a guided tour near Park City if one or more of these describe you:
- Resort expert, touring beginner: You ski black runs confidently in-bounds but are new to skinning, avalanche gear, and backcountry decision-making.
- First time in Utah’s snowpack: You have some touring experience elsewhere, yet you do not know local access points, common avalanche problems, or typical weather patterns.
- Skill-building focus: You want to learn how to plan a tour, read avalanche bulletins, use your beacon efficiently, and move in a group, not just “follow the leader.”
- Short visit, zero logistics: You have limited days and do not want to juggle navigation, access, and snow assessment on your own.
A guide is less appropriate if you expect guaranteed deep powder, huge vertical, or aggressive objectives regardless of conditions. Professional guides are hired to manage risk and deliver an enjoyable day, not to push into unstable terrain simply to “get after it.”
Guided backcountry vs resort-based ski days
Many visitors split their trip between touring days and resort days. A resort-focused option such as Utah Ski Resort Day Trips handles winter canyon driving and helps you navigate lift-served terrain efficiently. A backcountry guide, by contrast, focuses on human-powered access, avalanche risk management, and personalized route choice away from the lifts.
The comparison below highlights how the two styles of days differ in structure and responsibility.
| Aspect | Guided backcountry day near Park City | Resort-based day trip service |
|---|---|---|
| Main environment | Ungroomed, unpatrolled terrain accessed by touring | Marked, controlled resort runs and in-bounds terrain |
| Primary goal | Safe travel, education, and powder turns where conditions allow | Maximize lift-served skiing with minimal driving and logistics |
| Risk management | Guide manages avalanche terrain and route; guests follow protocols | Resort manages in-bounds hazards; guests stay within open areas |
| Fitness demand | Sustained uphill travel on skins; steady moderate effort | Shorter bursts of effort; lifts handle vertical gain |
| Client role | Active partner in safety, communication, and pacing | Focus on skiing and meeting times; logistics handled for you |
If you primarily want relaxed lift-accessed laps with local insight, a resort-focused service is enough. If you specifically want human-powered turns and avalanche education, a dedicated touring guide day is the better fit.
Process stages and responsibilities on a guided day
High-quality guiding looks very structured from the inside. Good guides follow a clear workflow from first contact to the last turns of the day. Understanding this sequence helps you know when to speak up, what you are signing off on, and how to prepare.
Stage 1: Initial inquiry and screening
The process usually starts with a detailed email, form, or phone call. This is not small talk. It is a risk management step where both sides confirm whether the day makes sense.
- Guide responsibilities: Ask about your skiing ability, fitness, prior touring and avalanche experience, medical considerations, and your goals for the day.
- Your responsibilities: Answer honestly, especially about fitness and comfort in variable snow, and share any non‑negotiables such as latest return time or must-avoid injury issues.
If the guide suggests a conservative plan, treat that as a sign of professionalism, not a lack of ambition.
Stage 2: Pre-trip planning and route options
Once the booking is set, the guide plans the day using weather and avalanche information plus your stated goals. Conditions near Park City can change quickly, so the final route is often decided close to the date.
- Guide responsibilities: Monitor avalanche forecasts and weather, choose a zone that matches the lowest-risk terrain for the day, and design a primary plan with backup options.
- Your responsibilities: Review any pre-trip information the guide sends, confirm you have the required gear, and ask questions about uphill distance, likely snow conditions, and start/finish timing.
A good sign is when the guide mentions “options” or a “plan A/B/C.” That flexibility is a core part of safe decision-making.
Stage 3: Morning meetup and safety briefing
The day usually starts early at a park-and-ride, trailhead, or convenient location in town. Before skins go on skis, there is a structured briefing.
- Guide responsibilities: Confirm the day’s plan, review the avalanche forecast in plain language, check every guest’s beacon, shovel, and probe, and explain communication norms and emergency procedures.
- Your responsibilities: Arrive on time, fully dressed, with boots, skins, and beacon ready. Listen actively, ask if anything is unclear, and participate in the group beacon check.
You should hear clear statements like “Our turn-around time is…” and “We will avoid slopes steeper than…” If you do not, that is a signal to ask directly.
Stage 4: Ascent and terrain management
Once you start touring, the guide’s main job shifts to managing pace and terrain choices. Your job is to give them accurate feedback on how you are doing.
- Guide responsibilities: Set a sustainable pace, adjust clothing and hydration breaks, continually assess the snowpack and terrain, and choose uptracks and descents that match conditions and the group’s energy.
- Your responsibilities: Communicate if you feel too hot, cold, tired, or nervous. Follow spacing instructions on the skintrack and descents, and stay where you can see and hear the guide.
Expect frequent short stops where the guide digs small hand pits, watches for signs of instability, or re-evaluates slope options. Those are not delays. They are part of the service you are paying for.
Stage 5: Descents, debrief, and wrap-up
On the way down, the guide will often break the run into segments with safe regrouping spots. At the end of the tour, there is usually a short recap.
- Guide responsibilities: Explain how to descend each pitch, identify safe islands to stop, manage one-at-a-time travel where needed, and review the day’s decisions afterward.
- Your responsibilities: Ski within your comfort zone, respect one-at-a-time instructions, and share feedback in the debrief about what you learned and what you might like to work on next time.
A thoughtful debrief that connects terrain choices back to the morning plan is a strong quality indicator. It means your guide is treating the day as education, not just crowd management.
You found a hidden promo code!
Use code WOWBLOG at checkout and get 10% OFF any tour!
Limited time offer. Book now and save!
Browse ToursTimeline and expected deliverables from a guided day
Although every tour is different, most guided days around Park City follow a predictable rhythm. Knowing the typical timing lets you plan meals, layers, and energy output more effectively.
Typical day schedule
This sample schedule shows how time usually breaks down on a full guided day.
| Time | Stage | Your focus |
|---|---|---|
| 6:30–7:30 am | Meetup and drive to trailhead | Finalize layers, quick snack, clarify questions |
| 7:30–8:00 am | Gear check and safety briefing | Beacon check, understand plan and boundaries |
| 8:00–11:30 am | First ascent and descent | Find rhythm on skins, practice transitions |
| 11:30 am–2:30 pm | Second lap or alternate route | Apply feedback, manage energy and hydration |
| 2:30–3:30 pm | Exit to trailhead | Stay focused on last transitions and safe travel |
| 3:30–4:00 pm | Debrief and drive back | Ask about next steps for skills and fitness |
Shorter half-days compress this schedule, typically with one ascent and one descent and an earlier finish.
What you should expect to “receive” from the service
A guided day is more than transportation and someone to break trail. At the end of a solid tour, you should walk away with several specific outcomes.
- Clear safety framework: A better grasp of how avalanche forecasts translate into go/no-go decisions and terrain choices.
- Movement skills: Practical feedback on skinning techniques, kick turns, transitions, and managing layers and hydration.
- Route-finding insight: Concrete examples of why certain ridges, aspects, or elevations were chosen or avoided.
- Personalized recommendations: Honest advice on whether you are ready for longer tours or steeper terrain and what to practice first.
If you feel like you only “followed instructions” but did not understand the reasoning behind them, you did not get the full value a good guide can offer.
Safety, quality control, and acceptance criteria
Because the mountains are uncontrolled terrain, you cannot “guarantee” outcomes. What you can evaluate is whether the guide’s process meets a high standard of care. Think in terms of procedures and communication rather than just the number of powder turns.
How professional risk management should look
Look for these tangible signs of quality before and during your tour.
- Transparent decision-making: The guide explains why they are choosing certain aspects or slopes, using the day’s avalanche and weather information in clear language.
- Conservative default: When conditions are uncertain, they choose lower-angle or less committing terrain instead of “sending it” because the group is excited.
- Continuous observation: The guide notices cracking, recent avalanches, changing wind, or significant warming and is willing to change the plan mid-day.
- Structured communication: You hear consistent instructions about spacing, regroup points, and what to do if you cannot see the guide.
“Safe backcountry travel is the art of matching terrain to the day’s conditions and the group’s abilities, then being ready to walk away from slopes that don’t feel right.”
A guide who models that mindset is delivering exactly what you are hiring them for, even if it occasionally means fewer runs.
Practical acceptance criteria for your guided day
You cannot control the weather or avalanche hazard, but you can define what a “successful” day means for you beyond snow quality.
- Safety first: No one is injured, and the group never knowingly enters terrain that conflicts with the current avalanche hazard.
- Clarity: You can summarize why the guide chose the routes they did, including at least one example of a slope you decided to avoid and why.
- Learning: You gain at least two new skills or habits, such as faster transitions or better skintrack etiquette.
- Control of stress: Where you felt nervous, it was from appropriate challenge, not from feeling uninformed or pushed into something you clearly did not want.
If those boxes are checked, you received strong value even on a day with tricky conditions or modest powder.
Client preparation checklist for a smooth day
Your preparation is a major part of safety and enjoyment. Showing up dialed lets the guide focus on terrain and group management instead of fixing gear problems all morning.
Physical and technical readiness
- Base fitness: Be comfortable hiking uphill at a steady moderate pace for several hours while carrying a light pack.
- Downhill skills: You should be able to make controlled turns in ungroomed snow at the resort, including crud and variable conditions.
- Practice transitions: If possible, practice putting skins on and off and switching your bindings and boots between walk and ski modes at home.
The more automatic those basic movements feel, the more bandwidth you will have for learning route and snowpack concepts during the tour.
Gear and clothing organization
Guides usually provide a gear list in advance. Use it actively rather than scanning it once the night before you go.
- Must-have safety gear: Avalanche transceiver, shovel, and probe that you know how to assemble and stow quickly.
- Layering system: Moisture-wicking base layers, breathable mid-layer, insulating piece for stops, and a weather-resistant shell.
- Food and water: Enough calories for a full day and at least 1–2 liters of water in containers that will not freeze easily.
- Functional pack: A backpack big enough for extra layers and safety gear, with shovel and probe accessible without unpacking everything.
Lay all items out the day before. If you are unsure whether something is appropriate, ask your guide ahead of time instead of guessing.
Communication and expectations
Many frustrations on guided days come from mismatched expectations, not from snow quality. Clear communication before the tour prevents that.
- State your true goal: Is your priority powder, education, photography, or simply a mellow introduction to touring? Say so clearly.
- Share constraints: Mention any hard stop times, altitude issues, or injuries that might flare up.
- Ask about pace: Request a realistic estimate of vertical gain and how often breaks will happen so you can mentally prepare.
Treat your guide as a partner planning with you, not a service planning for you.
Practical recommendations to get the most from your guided day
Small decisions before and during your tour can dramatically improve both safety and learning. Use these practical tactics to stack the odds in your favor.
- Choose education over ego: When offered a choice between a slightly steeper line and a clear teaching opportunity, pick the option that deepens your skills for future tours.
- Take notes after the tour: As soon as you get back to your lodging, jot down routes traveled, aspects, and the day’s avalanche concerns while they are fresh.
- Ask “why” once per hour: Periodically ask your guide why they chose the current route or regrouping spot so you can connect their thinking to what you see.
- Practice rescue skills separately: Use a resort day or open field to run beacon search drills so your first real practice is not on the tour itself.
- Build a trip ladder: Book your first guided day with conservative terrain, then gradually step up objectives over multiple seasons instead of trying to “do it all” at once.

Common mistakes clients make (and how to avoid them)
Recognizing frequent pitfalls can help you sidestep them and arrive as an ideal partner for your guide.
- Overstating ability: Saying you “ski anything” at the resort when you actually avoid firm moguls or steep trees leads to route choices that feel overwhelming. Be specific about the terrain you truly enjoy.
- Underestimating uphill effort: Many strong downhill skiers are surprised by how sustained the climbs feel. Build in some pre-trip fitness rather than relying on pure downhill strength.
- Arriving with untested gear: Brand-new boots, skins, or bindings that you have never used can derail the day with blisters or failed glue.
- Chasing powder at all costs: Pressuring the guide to ski steeper slopes than they recommend bypasses the reason you hired them. Focus on learning their decision framework instead.
Good guides can adapt to many situations, but avoiding these mistakes lets them focus on what you came for: a safe, confidence-building introduction to touring.
Two realistic guided-day scenarios near Park City
To make all of this more concrete, consider how two different days might feel in practice. Both can be successful, even though one has better snow than the other.
Scenario 1: Ideal snow, conservative terrain
Overnight snow and moderate avalanche danger set the stage. The guide chooses lower-angle glades with simple terrain features and clear runouts. You lap a few tree shots, practice safe spacing, and get specific feedback on your transitions.
By day’s end you have several excellent powder runs and a strong sense of how to read slopes for terrain traps. You leave feeling energized, not exhausted.
Scenario 2: Tricky conditions, strong learning
Wind, temperature swings, and a persistent weak layer create more complex hazard. The guide selects mellow ridges and meadows near treeline, avoiding big open bowls entirely. The skiing itself is mixed: some soft turns, some stiff crusts.
You spend more time discussing why you are avoiding certain aspects and practicing route-finding between safe islands. Despite “OK” snow, you finish the day with a much deeper grasp of decision-making and a clear list of skills to practice at the resort before your next tour.
How guided days relate to broader Utah ski tours
Many trip plans mix different styles of skiing across several days. A touring day near Park City fits neatly alongside lift-served days in other parts of the state. For instance, you might pair a human-powered outing with one or more resort-focused Utah Ski Resort Day Trips, where transport and resort navigation are handled for you.
Thinking about your whole trip this way helps you pace your energy and scheduling. You can target touring days when your legs are fresh and conditions look stable, then enjoy lift-accessed terrain on days with higher hazard or tired legs.
Guided backcountry skiing near Park City works best when you see it as a structured partnership rather than a black-box adventure. The guide brings terrain knowledge, snowpack assessment, and a clear process. You bring honest self-assessment, preparation, and active communication.
When both sides do their part, even modest objectives can feel rewarding and educational. You finish the day with concrete skills, a clearer sense of your limits, and a framework for planning future tours on your own or with a professional.
Plan your broader Utah trip so that touring days complement lift-accessed skiing, and consider using services from MateiTravel for resort-based logistics while you focus your guided backcountry days on learning and safe exploration.
If you want a smooth introduction to Utah’s snow with minimal hassle, start by organizing your resort days with MateiTravel and then build a guided touring day around that foundation.
How fit do I need to be for a guided backcountry day near Park City?
You should be able to hike uphill at a steady pace for several hours while carrying a light pack. If resort runs leave you exhausted after a few laps, build more endurance before touring.
Can a beginner skier book a guided tour in the backcountry?
Backcountry guiding assumes you already ski confidently on ungroomed resort terrain. If you are still learning parallel turns on groomers, focus on resort days first and tour later.
What happens if avalanche conditions are worse than expected?
A professional guide will shift to gentler terrain or shorten the tour to keep risk low. You should expect the plan to change if conditions do not match the original forecast.
Will a guided day guarantee deep powder turns?
No, snow quality depends on recent storms, wind, and temperature. Your guide’s primary job is managing risk and choosing the best available terrain for that specific day.
How much input can I have on the route choice during the day?
You can and should share your goals and comfort level, then ask why the guide prefers certain routes. Final decisions stay with the guide for safety reasons.
What should I do if I feel the pace is too fast on the ascent?
Tell the guide immediately so they can adjust the pace or take more frequent breaks. Honest feedback early keeps the entire group safer and more comfortable.
Is it normal for a guided tour to avoid steeper slopes even on a powder day?
Yes, especially if the avalanche forecast or observed signs point to instability. Choosing lower-angle terrain on such days is a mark of good guiding, not missed opportunity.
How should I prepare my gear the night before the tour?
Lay out all required items, test your beacon, assemble your shovel and probe once, and pack your bag so critical gear is easy to reach. This prevents delays and stress at the trailhead.

 Antelope Island – Wild Heart of the Great Salt Lake Adventure
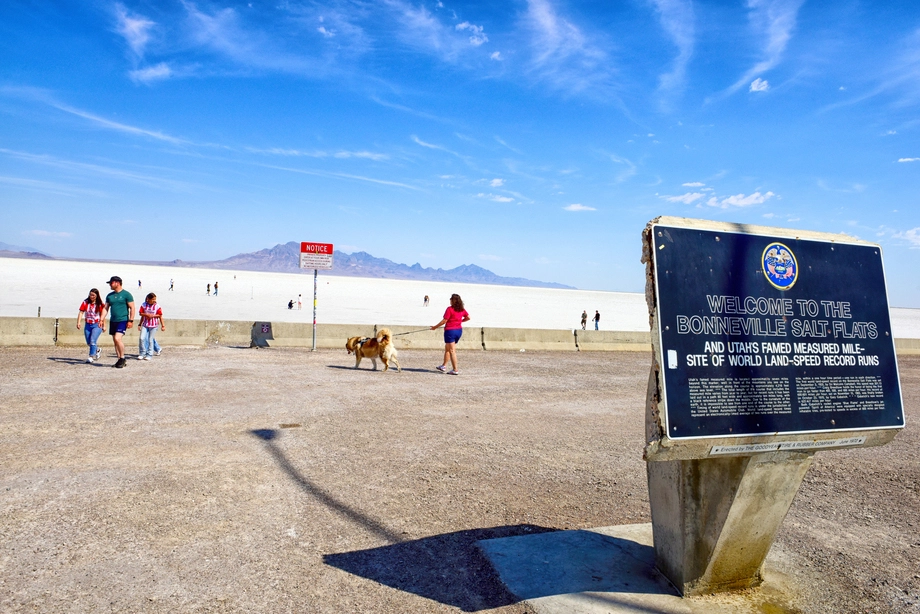 Bonneville Salt Flats – Journey to the Edge of the World
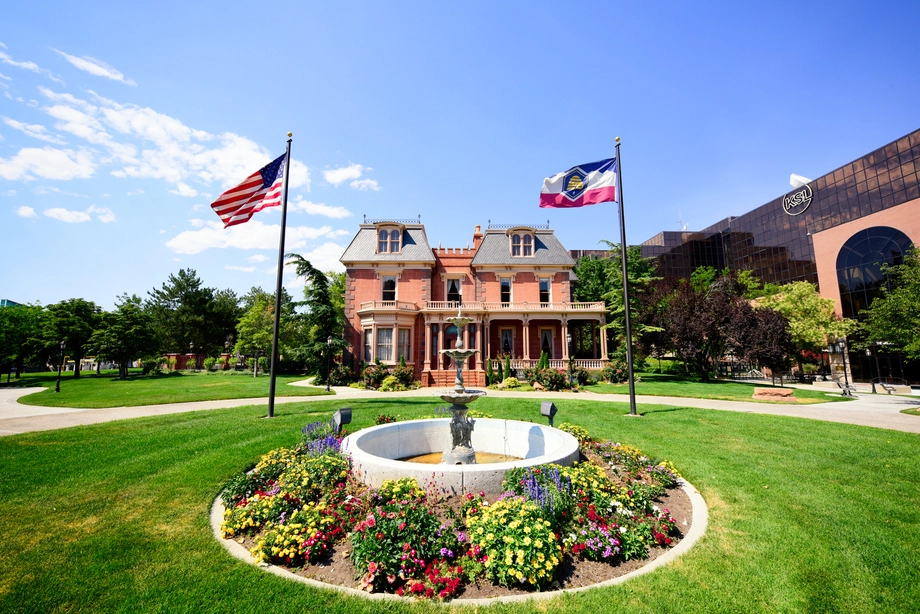 Salt Lake City – The City of Zion. Historical Interactive Walking Tour
 Bonneville Salt Flats – Sunset Adventure of the White Desert
 Antelope Island Sunset Wildlife Expedition – Great Salt Lake Odyssey