Backcountry skiing Utah: avalanche basics and first-timer safety playbook
Mar 6, 2026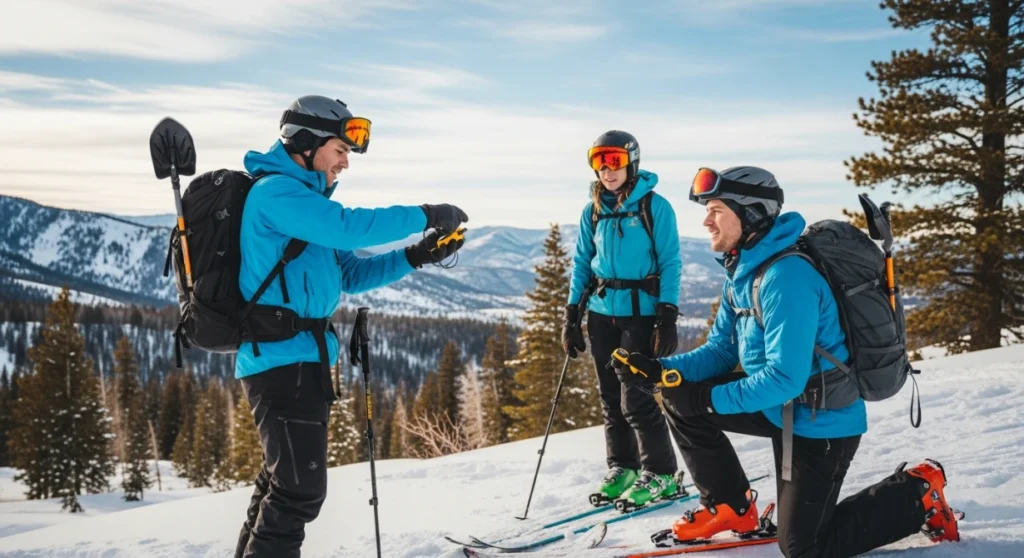
Avalanche risk in Utah is serious but manageable when you use conservative terrain, practice fast rescue skills, and follow a simple prevention protocol with clear group communication and honest self-checks.
The usual first-timer story in Utah’s powder goes like this: someone follows a skin track from a resort gate, assumes “it must be safe,” and only later learns they spent the day under active avalanche paths. The snow was unreal, the photos were perfect, and the risk was invisible. That gap between how calm the mountains look and how unstable the snowpack can be is exactly where beginners get hurt.
Utah averages several avalanche deaths each winter, with many more close calls that never make the news. Most of those accidents involve people who are good skiers but new to avalanche terrain. If you are dreaming about backcountry skiing Utah for the first time, the most valuable thing you can bring is not a wider ski. It is a clear mental model of how avalanches happen and how to avoid them.
Why first-timers underestimate avalanche danger in Utah
New backcountry riders often judge safety by surface clues: no recent slides, a few tracks on a slope, bluebird weather. The problem is that Utah’s snowpack can hide weak layers for weeks while still looking smooth and inviting. You can ski the same line many times before it fails once, which rewards risky behavior.
Another trap is overconfidence from resort experience. If you handle steep black runs at the lift-served areas, it is easy to assume that “sidecountry” just beyond the rope is similar. In reality, once you leave controlled slopes, no one has thrown explosives or managed the snow for you. Ski patrol is not watching that terrain, and rescue response times jump dramatically.
Visitors who come on short trips and squeeze in one or two days in the mountains can be especially vulnerable. They often feel pressure to “make it count,” even when the conditions or their preparation say they should dial it back.
Recognizing early warning signs and their real impact
Before talking about mistakes, you need to know what danger actually looks and feels like in the field. Many warning signs are subtle, but once you know them, they are impossible to unsee. Treat these symptoms as reasons to slow down, regroup, or change objectives.
On-snow symptoms you should never ignore
- Recent avalanche activity: Fresh debris or crowns on similar aspects and elevations tell you the snowpack is already failing under current conditions.
- Whumpfs and cracks: Hollow “whoomph” sounds or shooting cracks around your skis show a weak layer is collapsing. That same layer can fail on steeper slopes.
- Heavy new snow or rapid warming: Large overnight snowfall or a quick temperature spike adds stress to weak layers and can flip conditions from manageable to dangerous in hours.
Each of these signs should change your plan. The business impact for a guiding company is obvious: one poor decision can cost lives. For you and your partners, it means ruined trips, injuries, and long-term consequences that go far beyond a single powder day.
You found a hidden promo code!
Use code WOWBLOG at checkout and get 10% OFF any tour!
Limited time offer. Book now and save!
Browse ToursTop avalanche mistakes first-time Utah backcountry skiers repeat
Most avoidable accidents trace back to a short list of behavior patterns. Understanding why they happen is the first step to changing them.
Mistake 1: Treating a skin track like a safety guarantee
Following an existing uptrack or storm-day highway of ski tracks feels comforting. Humans assume “other people did this and survived, so it must be fine.” But avalanche risk does not work like traffic risk. Stability can change during the day, and one extra skier can be enough to trigger a weak layer.
Why it happens: Social proof, time pressure, and lack of terrain-reading skills push people to trust tracks instead of their own observations. This is especially common for visitors on limited schedules who want to maximize their day.
Fix: Use tracks for efficiency, not safety. Before stepping onto any slope, ask three questions: What is the approximate steepness here, where is the avalanche path, and what happens if it slides? If you cannot answer, stop and reposition to low-angle ground until you can.
Mistake 2: Carrying avalanche gear but not knowing how to use it
Essential avalanche rescue tools are a transceiver, shovel, and probe. In many incidents, victims and partners had this gear, yet rescues still took too long because people fumbled with switches, search techniques, and shoveling strategy.
Why it happens: New travelers focus on buying equipment and assume they will “figure it out on the skin track,” or they have practiced once in a parking lot and think that is enough.
Fix: Practice full burial scenarios until you can perform a rescue in under 10 minutes using consistent techniques. Time yourself. Rotate roles. Combine this with basic backcountry first aid practice like managing trauma and bleeding so your rescue does not stall once the person is uncovered.
Mistake 3: Planning big objectives without a conservative fallback
Utah’s classic lines are tempting, and photos from friends or social media raise expectations. Beginners often set an ambitious target, then stick to it even when conditions, visibility, or group energy say they should back off.
Why it happens: Scarcity mindset during short trips, sunk-cost feeling after a long approach, and group dynamics where no one wants to be “the cautious one.”
Fix: Build your day around options, not a single line. Start with a conservative plan on lower-angle slopes and add steeper goals only if conditions and observations support it. Agree as a group before leaving the trailhead that anyone can veto terrain without needing to justify it.
Mistake 4: Mixing resort and true backcountry days without changing mindset
Visitors often book utah ski tours from Salt Lake City to reach resort slopes, then wander through gates into unmanaged terrain, treating it as an extension of their lift day. That mix of guided logistics with unguided risk decisions can be dangerous.
Why it happens: The logistics feel professional and organized, so riders subconsciously assume someone has assessed all risks, even outside ski area boundaries.
Fix: Draw a clear mental line at the resort boundary. Inside, assume snow safety has been actively managed. Outside, assume no one has done any control work and that you are fully responsible for hazard assessment, route finding, and rescue.
From mistake to fix: a simple avalanche decision pattern
To avoid repeating the same errors, use a consistent pattern whenever you leave managed terrain. Think of it as a quick loop you run all day: plan, observe, decide, and adjust.
1. Plan with terrain, not just destination, in mind
- Define safe zones: Choose routes that favor slopes under roughly 30 degrees for primary travel and skiing when you are learning.
- Identify traps: Note gullies, creek beds, and dense trees where even small avalanches can bury a person deeply.
- Pre-plan outs: Mark lower-angle alternatives and early turnaround points so you are not improvising under pressure.
2. Observe for instability all day
Do not relegate observations to a single snow pit. Pay attention to how the snow feels under your skis at every transition. Look for recent avalanche debris on your aspect and elevation, especially after new snow or wind.
Notice how temperature changes as you move. Rapid warming that softens the surface can quickly add stress to buried weak layers and increase the chance of natural releases on sun-exposed slopes.
3. Decide as a group, not as individuals
Before committing to a slope, ask each person if they are comfortable with the terrain and conditions. If anyone is unsure, choose a more conservative option without debate. This removes the pressure to defend caution and prevents quiet discomfort from turning into forced participation.
Keep group size modest so that communication remains clear. Smaller teams move faster, make quicker transitions, and can more easily keep track of who is where on the slope.
4. Adjust when reality conflicts with the plan
If you see red flags like whumpfs, fresh slabs, or natural avalanches on nearby slopes, treat them as new information, not background noise. Drop to lower-angle terrain or shift to treed ridges that avoid overhead hazard.
Similarly, if a partner is tired, cold, or moving poorly, shorten the day. Fatigue leads to rushed transitions and sloppy communication, which matter just as much as snow stability.
Prevention protocol for safer Utah backcountry days
Once you understand the common errors, prevention becomes about habits. Build a lightweight routine you can actually follow every time you leave the trailhead.
Pre-trip checklist
- Gear check: Everyone carries a working transceiver, shovel, and probe, with batteries checked and beacon range tested before departure.
- Skill refresh: Run a 10-minute rescue drill in a park or parking lot in the days before your tour. Include probing and efficient shoveling, not just signal search.
- Route sanity test: Look at your planned lines and ask if you would feel comfortable taking a newer partner there under today’s conditions. If not, step down the ambition.
On-route protocol
- Spacing: Travel one at a time on any slope where a slide could carry or bury a person, with clear visual contact and predetermined safe spots.
- Communication: Use simple, agreed signals for “stop,” “go,” and “I am not comfortable.” Keep radios or clear voice range if possible.
- Observation log: Verbally call out signs of instability so everyone updates their mental picture: “I saw a fresh slab across the valley,” or “I just got a small shooting crack.”
Post-trip review
Back at your lodging or in town, spend ten minutes reviewing the day. What did you do well, what surprised you, and what would you change next time? Short debriefs compound your learning much faster than random experience.
If you are pairing a city stay with mountain days or southwest tours Utah that spend more time on scenic drives than snow, use those evenings to study maps and terrain photos so your next backcountry day feels more familiar.
Rescue skills that actually work under pressure
Avalanche safety has two sides: avoiding slides and being ready if avoidance fails. The second side demands fast, coordinated rescue skills.
Research in avalanche accidents shows that performing a complete companion rescue in less than ten minutes using effective techniques is critical for survival in a full burial.
Core rescue standards for first-timers
- Transceiver fluency: You should be able to switch from send to search instantly, follow a coarse and fine search without hesitation, and transition to probing without confusion.
- Probe accuracy: Practice a tight spiral probing pattern over the final signal area so you can locate a buried partner quickly and avoid wasting time on random stabs.
- Shovel strategy: Use a conveyor-style digging method from downhill of the probe strike so multiple rescuers can move snow efficiently without getting in each other’s way.
Backcountry first aid training focused on trauma and bleeding control turns a fast rescue into real survivability. Practice simple scenarios like stabilizing a leg injury on a slope or managing heavy bleeding with limited supplies so those skills are automatic when stress is high.
How guided and non-guided Utah days fit together
Many visitors structure a Utah trip around city time, resort skiing, and desert sightseeing, then add one or two touring days. That mix can work well if you are honest about where your avalanche skills stand and how much decision-making you want to own.
Leveraging organized city and resort days
Joining organized day trips from Salt Lake City to nearby canyon resorts can give you a low-stress way to explore snow and layout. Local driver-guides handle winter canyon driving, parking, and basic mountain orientation while you focus on skiing.
These days are especially helpful if you are newer to the region. You can ask targeted questions about typical storm patterns, common backcountry access points, and how locals think about terrain progression, all while staying on managed slopes where avalanche control work has been done.
Using your time in town and the desert wisely
Salt Lake City walking tours with local guides can sound unrelated to avalanche safety, yet they have indirect benefits. Small groups, the chance to ask questions, and a structured route through complex streets mirror how effective mountain communication and navigation feel, just without the cold.
If you join scenic trips to Utah’s national parks with transport and commentary included, treat them as low-risk days to reset physically. Use the long drives and short hikes to review avalanche basics on your own, study maps, and plan future objectives rather than chasing every powder day without rest.

Practical examples: two first-timer days, two outcomes
Scenario 1: Ignoring warning signs on a “perfect” bluebird day
A group of strong resort skiers on a work trip to Salt Lake City decides to duck a gate after a storm. They see several existing tracks on a steep open face above a gully and assume it is safe. On the way up, they hear subtle whumpfs but do not discuss them.
On the second lap, the third skier triggers a slab that runs into the gully and partially buries them. Rescue is chaotic because the group has never practiced together. They manage to dig their friend out, but it takes longer than ten minutes and results in significant injuries. The entire trip shifts from fun to crisis.
Scenario 2: Conservative terrain and clear group protocol
Another group, also new to Utah, chooses a tour with mostly low-angle glades and ridgelines on a day following heavy snow. At the trailhead, they run a five-minute transceiver check and confirm their communication plan.
On the skin track they spot fresh avalanche debris on steeper slopes nearby and decide to keep their turns to slopes under about 30 degrees. They lap safe terrain, end the day tired but intact, and spend the evening in town walking a guided city route, talking through what they saw and how it will shape future objectives.
Comparison tables: gear, skills, and day types
Table 1: Essential avalanche rescue gear and use
| Item | Primary purpose | Beginner usage goal |
|---|---|---|
| Transceiver | Locate a buried partner via signal search | Switch modes instantly and complete a fine search without hesitation |
| Probe | Pinpoint burial depth and exact location | Accurately confirm location within a tight probing pattern |
| Shovel | Excavate snow to reach victim fast | Use efficient downhill shoveling with coordinated team effort |
Table 2: Different Utah day types and avalanche decision load
| Day type | Terrain management | Your avalanche decision responsibility |
|---|---|---|
| Resort skiing within boundaries | Snowpack is actively controlled by professionals | Monitor closures and signs, but control work reduces your direct decisions |
| Sidecountry beyond resort gates | No active control once outside boundaries | Full responsibility for terrain choices, rescue skills, and group management |
| City or national park sightseeing tours | Focus on driving, walking, and viewpoints | Opportunity to rest and plan; no avalanche decisions needed |
Quick self-diagnosis checklist for your first Utah backcountry trip
Before committing to a tour outside managed terrain, run through this short checklist. Honest yes-or-no answers will tell you whether to proceed, scale back, or seek more training first.
- Rescue practice: Can you and your partners perform a full burial rescue with transceiver, probe, and shovel in under ten minutes in practice?
- Terrain understanding: Can you roughly identify slopes that are steep enough to slide and avoid obvious terrain traps on a map and in the field?
- Group process: Do you have a clear veto rule, communication plan, and shared understanding that turning around is a successful outcome?
- Energy and schedule: Are you building in rest days or lower-risk sightseeing between intense ski days so fatigue does not drive your decisions?
- Fallback options: Do you have at least one easier route or resort day you would be genuinely happy to choose if conditions or observations suggest stepping down?
Conclusion
Utah’s mountains offer incredible snow, but avalanche risk stays invisible until you learn to recognize it and build habits that keep you out of trouble. For first-timers, the biggest gains come from avoiding classic mistakes, practicing fast rescue skills, and choosing terrain that matches your current experience instead of your ambitions. Balance high-energy ski days with lower-risk city walks or national park visits so you stay sharp when it matters most. With a simple prevention protocol and honest self-checks, you can enjoy deep powder without gambling blindly on the snowpack. When you are ready to weave safe skiing into a well-planned Utah itinerary, MateiTravel can help you connect city, desert, and mountain days into a thoughtful trip.
Do I need avalanche gear for my very first Utah backcountry day?
Yes, each person should carry a transceiver, shovel, and probe from day one and know how to use them together in a full rescue.
How steep is “too steep” for beginners concerned about avalanches?
For early tours, keep your main skiing on lower-angle slopes and avoid obvious steep open faces until you have more training and experience.
Are resort gates in Utah leading to controlled terrain?
Once you pass a resort boundary gate into unmanaged slopes, you should assume there has been no avalanche control work and act accordingly.
How often should I practice avalanche rescue skills?
Practice regularly and especially in the days before a tour so you can complete a full burial rescue in under ten minutes without confusion.
Can I combine sightseeing with a backcountry ski trip safely?
Yes, using city walks and national park visits as rest or planning days helps you stay rested and make better decisions on your ski days.
What group size works best for first-time avalanche terrain travel?
Small groups help communication and spacing, making it easier to watch each other and adjust plans quickly as conditions change.
How do I know if my planned objective is too ambitious?
If you would hesitate to take a less experienced friend there under current conditions, step down to a more conservative route.
What should we discuss at the trailhead before starting a tour?
Confirm gear checks, communication signals, the veto rule, and at least one conservative backup plan before leaving the parking area.

 Bonneville Salt Flats – Sunset Adventure of the White Desert
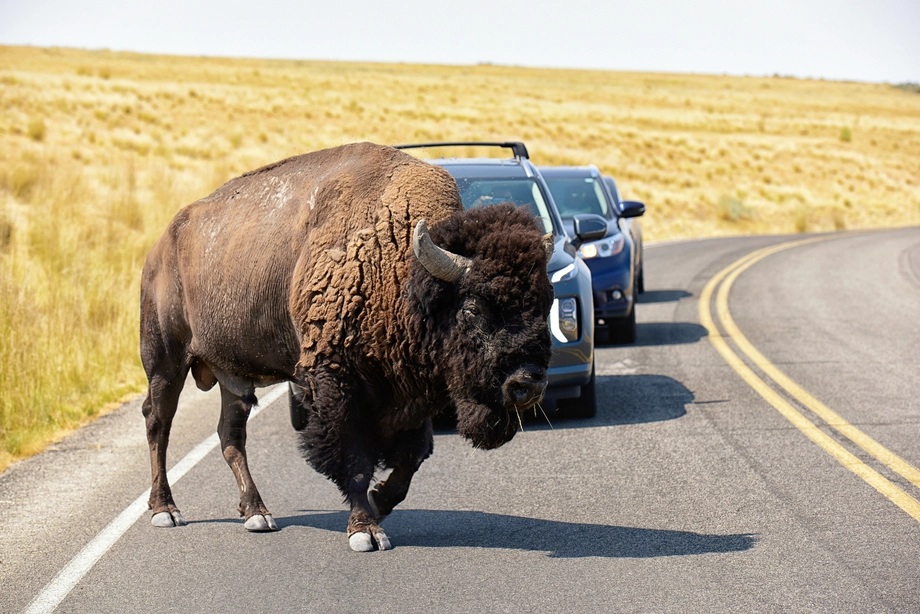 Antelope Island – Wild Heart of the Great Salt Lake Adventure
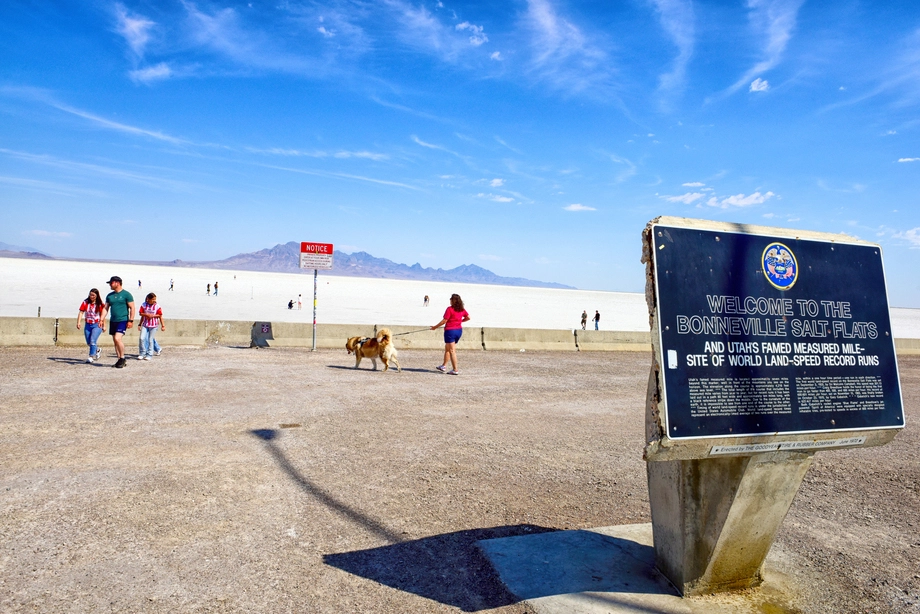 Bonneville Salt Flats – Journey to the Edge of the World
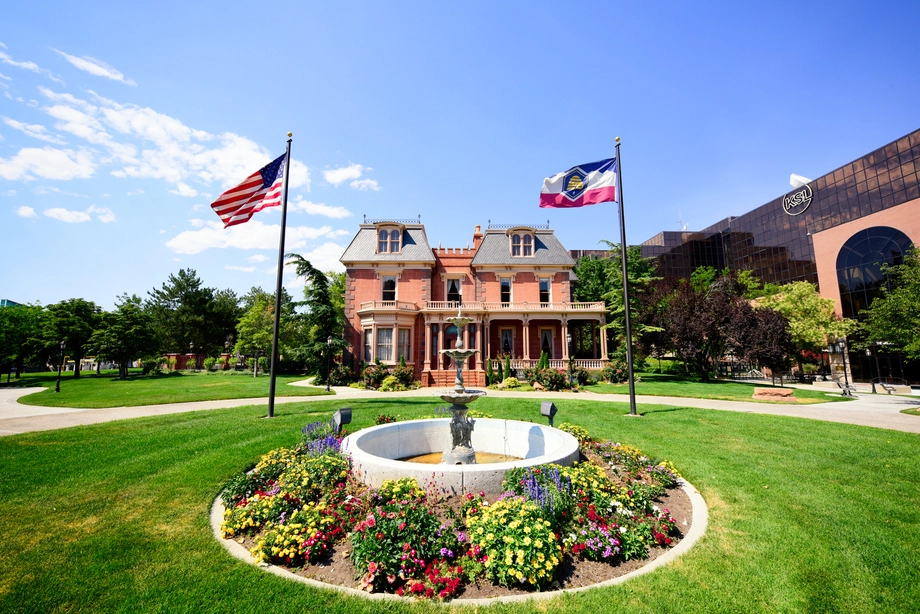 Salt Lake City – The City of Zion. Historical Interactive Walking Tour
 Antelope Island Sunset Wildlife Expedition – Great Salt Lake Odyssey